In this lesson we’ll be looking at another common tool used in rhythmic notation. It’s called a tie and, like dots, is a way of writing notes that are of longer duration than normal.
Let’s take a look at an example of a tie…
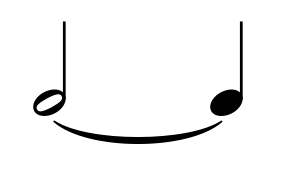
In this example we have a half note followed by a quarter note. The curved line that connects both of these notes together is a tie.
I should mention here that both the notes either side of the tie line have to be exactly the same pitch. So if the note before the tie line is an E-note, then the note after the tie line must also be an E-note. If the notes aren’t the same pitch, then the curved line will most likely be a slur line. (On guitar, a slur line often means that the second note is played using either a hammer-on or a pull-off).
What The Tie Means
As I mentioned just before, a tie is a method of notating a note that’s of longer duration than normal. In the example above, we have a half note tied to a quarter note. This means that we only play the first note, but we add the time value of both notes together. Because a half note lasts for two beats and a quarter note lasts for one beat, the total length of the note we need to play is three beats.
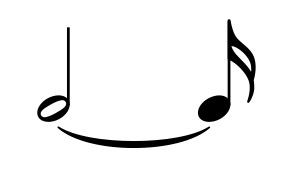
The cool thing about ties is that any two notes of the same pitch can be joined together. So if we wanted to write down a note that lasted for two and a half beats, we could do this…

Or how about a note that lasts for two and a quarter beats? That would be easy, we could write it down like this…
The possibilities are endless—using ties we can write down notes of any length!
A Couple Of Exercises To Practice
Now that we’ve talked a little bit about the theory behind ties, let’s look at two exercises that use ties.
Before you play each exercise, I highly recommend writing the counting out underneath the standard notation. Doing this will ensure that you totally understand the rhythmic notation—if you don’t understand the notation, then you won’t be able to write out the counting correctly!
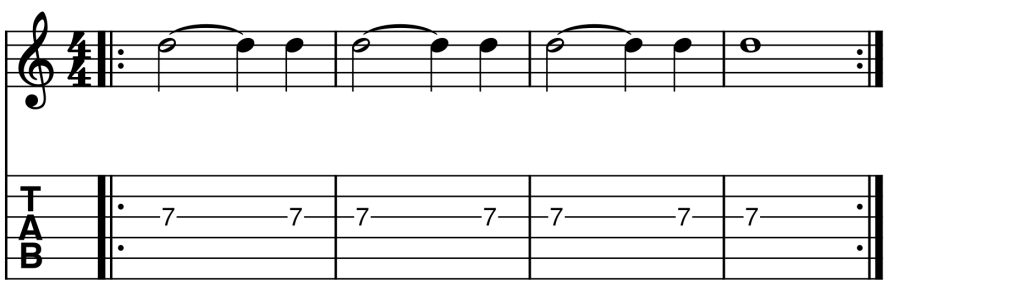
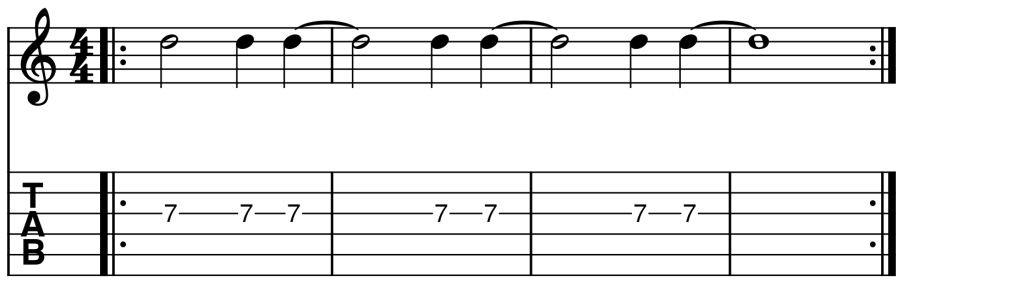
Tie Exercise 1
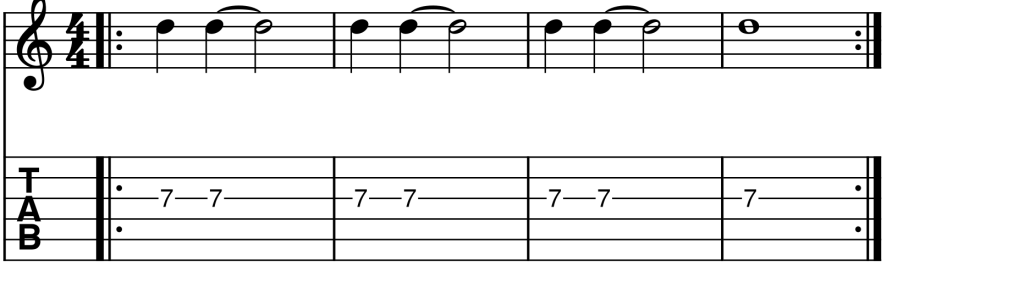
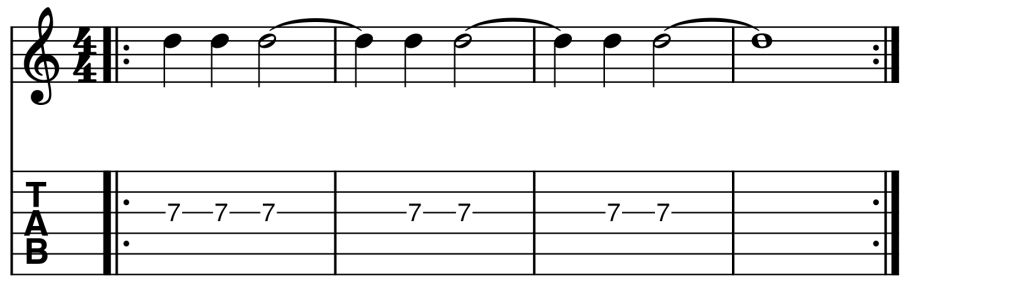
Tie Exercise 2
Crossing The Barline
Now that you’ve spent some time practising the exercises, let’s now talk about a very common place that ties are used—crossing the barline.
“Crossing the barline” refers to when we start a note in one bar and end the note in the following bar. To see what I mean by this, have a look at the example below…

In this example the last note of bar one is played on beat four. This note then continues to ring out for the first two beats of the second bar. If this isn’t clear from looking at the example, then I’d recommend writing out the counting underneath the music. (I’m assuming you’ve got access to a printer to print out this webpage!). 🙂
Two More Exercises
The following two exercises use ties over the barlines…
Tie Exercise 3
Tie Exercise 4
An Application Exercise
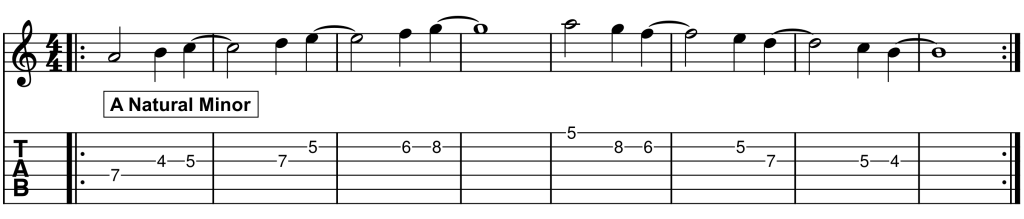
Once you’re comfortable with an exercise, it’s a good idea to find a way of making it more challenging. One way of doing this is to practice a scale using the rhythm of the exercise. For example, here’s the rhythm of Tie Exercise 3 applied to the A natural minor scale…
Application Exercise
I recommend practising this application exercise over the backing track that I’ve included with this lesson. It’s a lot more fun than a using metronome and will definitely make the exercise sound much more musical. 🙂
A Few Last Words
Have fun with this lesson—the exercises will definitely help you get used to playing rhythms that use ties, so be sure to practice them as much as you can. Also, don’t be afraid of creating some exercises of your own!
Return To: Guitar Music Theory Lessons